No ID? Start Here — How to Get Government IDs from Scratch (2026)
Walang ID? Magsimula Dito — Paano Kumuha ng Government ID Mula sa Wala (2026)
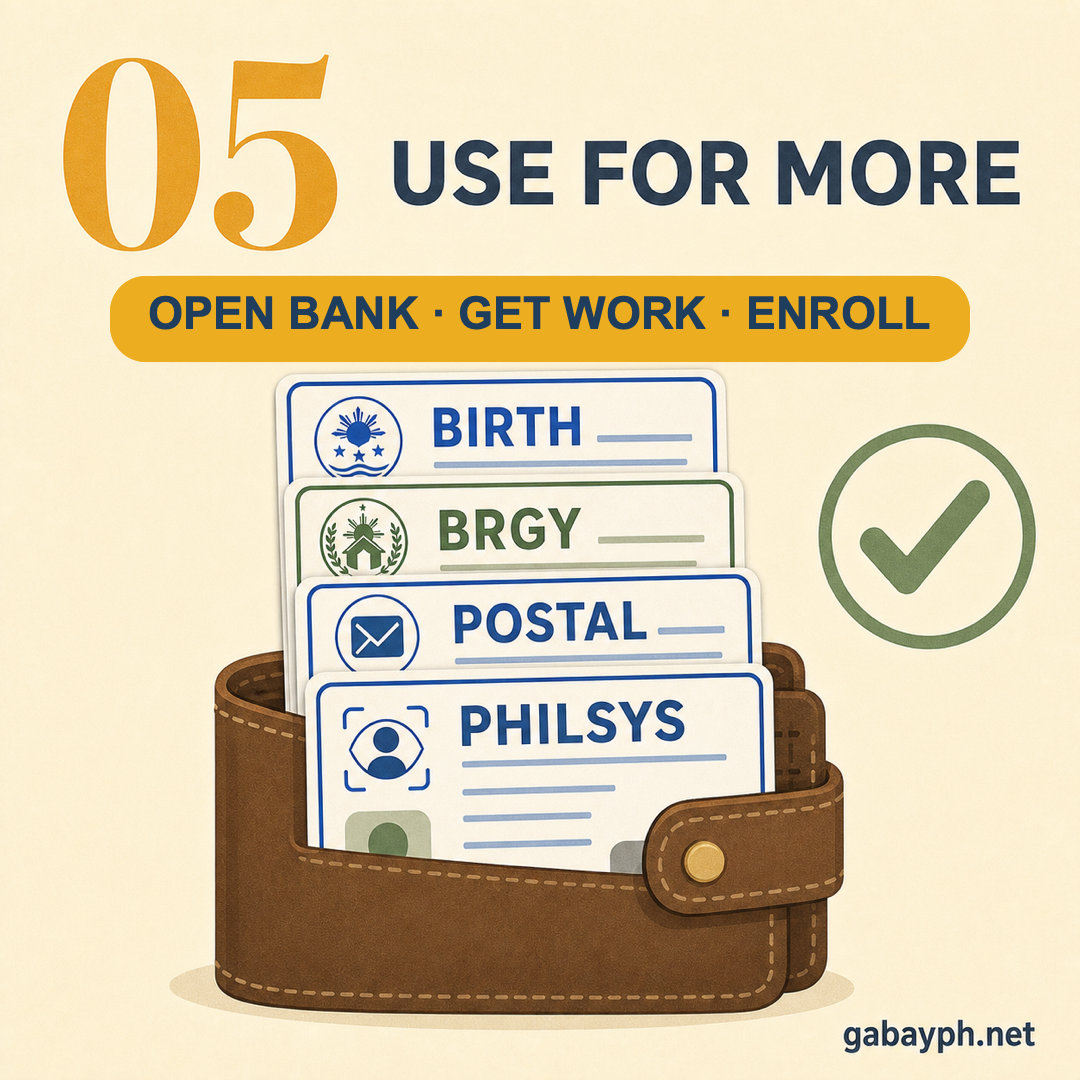
5 Things to Know
Zero ID starter pack in five facts.

Quick Summary
Mabilis na Buod
Table of Contents
Talaan ng Nilalaman

Who Is This Guide For?
Para Kanino ang Gabay na Ito?
This guide is for Filipinos who have zero government-issued IDs — or close to it. Maybe you just turned 18 and never applied for anything. Maybe you lost all your documents in a fire, flood, or move. Maybe you grew up in a rural area where nobody told you how to start. Whatever your situation, this guide will walk you through exactly how to build a complete ID portfolio from scratch, starting with nothing more than a birth certificate.
Ang gabay na ito ay para sa mga Pilipinong walang government-issued ID — o halos wala. Baka kaka-18 mo lang at hindi ka pa nag-apply ng kahit ano. Baka nawala ang lahat ng mga dokumento mo sa sunog, baha, o paglipat. Baka lumaki ka sa probinsya kung saan walang nagsabi sa iyo kung paano magsimula. Anuman ang sitwasyon mo, gagabayan ka ng guide na ito sa eksaktong paraan ng pagbuo ng kumpleto na ID portfolio mula sa wala, simula sa birth certificate lang.
By the end of this process (6–8 weeks total), you will have:
Sa katapusan ng prosesong ito (6–8 linggo sa kabuuan), magkakaroon ka ng:
- PSA Birth Certificate
- Barangay Clearance
- Postal ID
- National ID (PhilSys)
- NBI Clearance
- TIN
- SSS, PhilHealth, and Pag-IBIG numbers
- Enough supporting documents for a Passport or Driver's License
- PSA Birth Certificate
- Barangay Clearance
- Postal ID
- National ID (PhilSys)
- NBI Clearance
- TIN
- SSS, PhilHealth, at Pag-IBIG numbers
- Sapat na supporting documents para sa Passport o Driver's License
The ID Roadmap: Your 7-Step Path
Ang ID Roadmap: 7-Hakbang na Daan Mo
Here is the exact sequence. Each step uses the IDs you already have from previous steps. Think of it as leveling up in a game — every new ID unlocks more doors:
Narito ang eksaktong pagkakasunod-sunod. Ang bawat hakbang ay gumagamit ng mga ID na mayroon ka na mula sa mga naunang hakbang. Isipin mo itong pag-level up sa isang laro — bawat bagong ID ay nagbubukas ng mas maraming pintuan:
- PSA Birth Certificate — your foundation (everyone starts here)
- Barangay Clearance — needs birth cert + cedula only
- Postal ID — accepts birth cert + barangay clearance
- National ID (PhilSys) — accepts birth cert alone
- NBI Clearance — now you have 2+ valid IDs
- TIN — for employment and taxes
- SSS / PhilHealth / Pag-IBIG — mandatory for any job
- PSA Birth Certificate — ang iyong pundasyon (lahat dito nagsisimula)
- Barangay Clearance — kailangan lang ang birth cert + cedula
- Postal ID — tumatanggap ng birth cert + barangay clearance
- National ID (PhilSys) — tumatanggap ng birth cert lang
- NBI Clearance — ngayon may 2+ valid ID ka na
- TIN — para sa trabaho at buwis
- SSS / PhilHealth / Pag-IBIG — mandatory para sa anumang trabaho
After completing all 7 steps, you will also have enough supporting documents to apply for a Philippine Passport or Driver's License — the two most powerful IDs in the country.
Pagkatapos makumpleto ang lahat ng 7 hakbang, magkakaroon ka rin ng sapat na supporting documents para mag-apply ng Philippine Passport o Driver's License — ang dalawang pinakamakapangyarihang ID sa bansa.
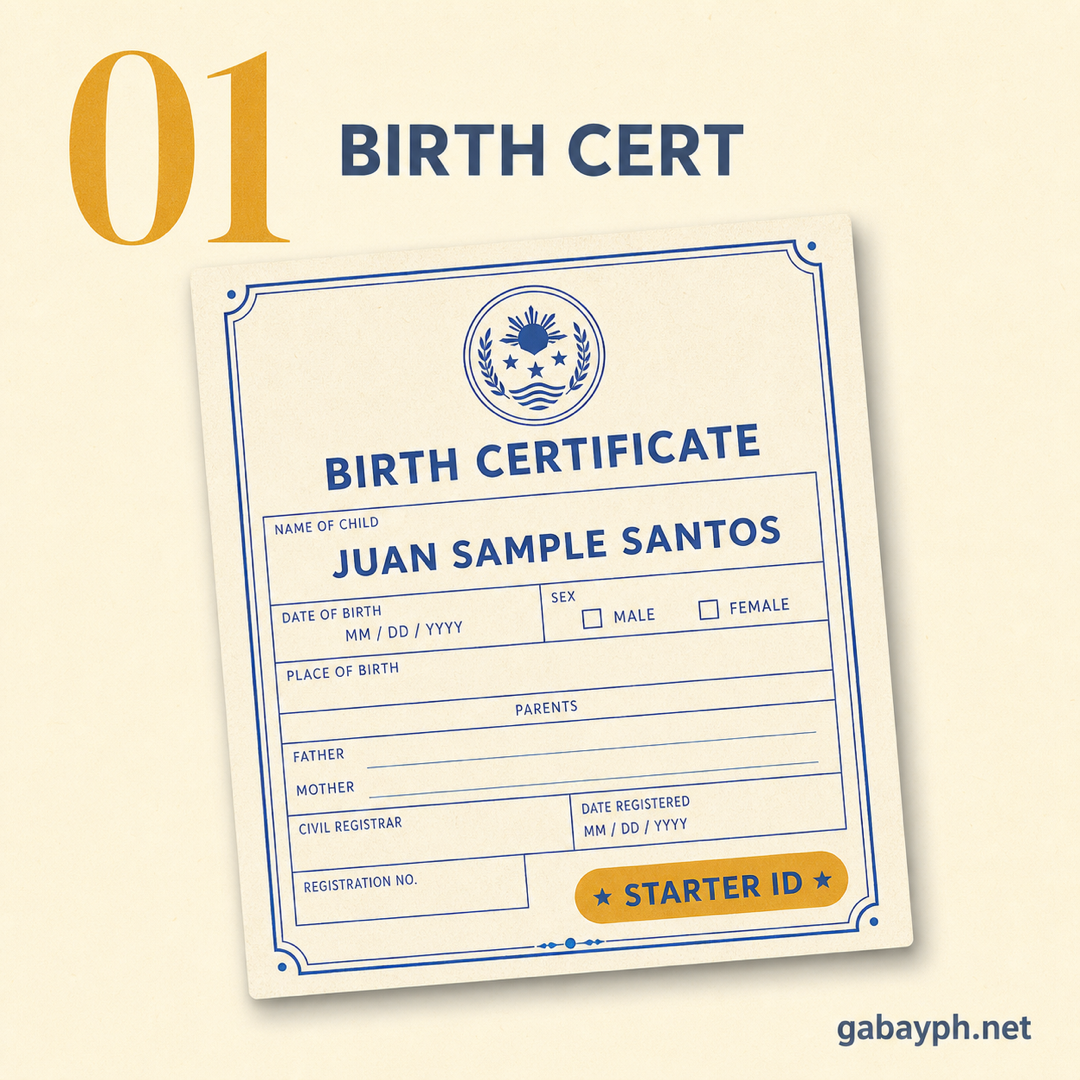
Step 0: Get Your PSA Birth Certificate
Hakbang 0: Kumuha ng PSA Birth Certificate
Everything starts here. Your PSA birth certificate (issued by the Philippine Statistics Authority, formerly NSO) is the one document that proves you exist in the eyes of the Philippine government. It is your foundation. Without it, you cannot get anything else.
Lahat ay nagsisimula dito. Ang iyong PSA birth certificate (inilalabas ng Philippine Statistics Authority, dating NSO) ang isang dokumentong nagpapatunay na ikaw ay umiiral sa mata ng gobyerno ng Pilipinas. Ito ang iyong pundasyon. Kung wala nito, hindi ka makakakuha ng iba pa.
If You Already Have a PSA Birth Certificate
Kung Mayroon Ka Nang PSA Birth Certificate
Great — skip ahead to Step 1. Just make sure it is an original copy on PSA security paper (not a photocopy, not a local civil registrar copy). Most agencies require the PSA-issued version. If your copy is old and worn out, order a fresh one — it only costs ₱155 online.
Magaling — lumaktaw na sa Hakbang 1. Siguraduhin lang na ito ay original copy sa PSA security paper (hindi photocopy, hindi local civil registrar copy). Karamihan ng ahensya ay nangangailangan ng PSA-issued na bersyon. Kung luma na at sira-sira ang kopya mo, mag-order ng bago — ₱155 lang online.
If You Don't Have One (Lost, Damaged, or Never Had It)
Kung Wala Ka (Nawala, Nasira, o Hindi Nakuha)
You can order a PSA birth certificate in several ways:
Maaari kang mag-order ng PSA birth certificate sa iba't ibang paraan:
- Online via PSAHelpline.ph — the easiest method. Create an account, fill out the form, pay ₱155 + ₱50 delivery fee via GCash, Maya, or bank transfer. Delivered to your door within 3–5 business days in Metro Manila, 5–8 days for provinces.
- Walk-in at SM Business Centers — many SM malls have PSA Serbilis outlets. Bring a valid ID (if you have one) or just know your full name, date of birth, and parents' names. Fee is ₱155, claim within 3–7 business days.
- Walk-in at PSA Civil Registry Outlet — visit any PSA outlet (formerly NSO). Same fee, same timeline.
- Online sa PSAHelpline.ph — ang pinakamadaling paraan. Gumawa ng account, sagutan ang form, magbayad ng ₱155 + ₱50 delivery fee sa pamamagitan ng GCash, Maya, o bank transfer. Ide-deliver sa iyong bahay sa loob ng 3–5 business days sa Metro Manila, 5–8 araw para sa probinsya.
- Walk-in sa SM Business Centers — maraming SM mall ang may PSA Serbilis outlet. Magdala ng valid ID (kung mayroon ka) o alamin lang ang iyong buong pangalan, petsa ng kapanganakan, at pangalan ng mga magulang. Bayad ay ₱155, kunin sa loob ng 3–7 business days.
- Walk-in sa PSA Civil Registry Outlet — bumisita sa kahit anong PSA outlet (dating NSO). Pareho ang bayad at timeline.
Step-by-Step: Build Your Government ID Portfolio
Hakbang-Hakbang: Buuin ang Iyong Government ID Portfolio
-
Step 1: Get a Barangay Clearance (Day 1)
Hakbang 1: Kumuha ng Barangay Clearance (Araw 1)
The barangay clearance is the easiest government document to get and the perfect starting point when you have zero IDs. Most barangay halls will accept your PSA birth certificate as your sole form of identification because they can verify you are a resident through their own records.
Ang barangay clearance ang pinakamadaling government document na makuha at ang perpektong simula kapag wala kang ID. Karamihan ng barangay hall ay tatanggapin ang iyong PSA birth certificate bilang iyong tanging identifikasyon dahil mave-verify nila na residente ka sa pamamagitan ng kanilang sariling mga talaan.
What you need:
Ang kailangan mo:
- PSA Birth Certificate (original)
- Cedula / Community Tax Certificate (you can get this at the same barangay hall for ₱50–200)
- Know your address and be a resident of the barangay
- PSA Birth Certificate (original)
- Cedula / Community Tax Certificate (makukuha mo ito sa parehong barangay hall sa halagang ₱50–200)
- Alamin ang iyong address at maging residente ng barangay
Cost: ₱100–350 total (cedula + clearance fee)
Time: 15–30 minutes, walk-in
Validity: 6 months to 1 yearGastos: ₱100–350 kabuuan (cedula + clearance fee)
Oras: 15–30 minuto, walk-in
Bisa: 6 na buwan hanggang 1 taonGo to your barangay hall early in the morning (8:00 AM is best). Get your cedula first, then apply for the barangay clearance. Dalawang bayad, isang biyahe. You will walk out with your first real government-related document.
Pumunta sa iyong barangay hall nang maaga sa umaga (8:00 AM ang pinakamabuti). Kumuha muna ng cedula, pagkatapos ay mag-apply ng barangay clearance. Dalawang bayad, isang biyahe. Lalabas ka na may unang tunay na government-related na dokumento.
Read our full guide: How to Get a Barangay Clearance
Basahin ang aming buong gabay: Paano Kumuha ng Barangay Clearance
-
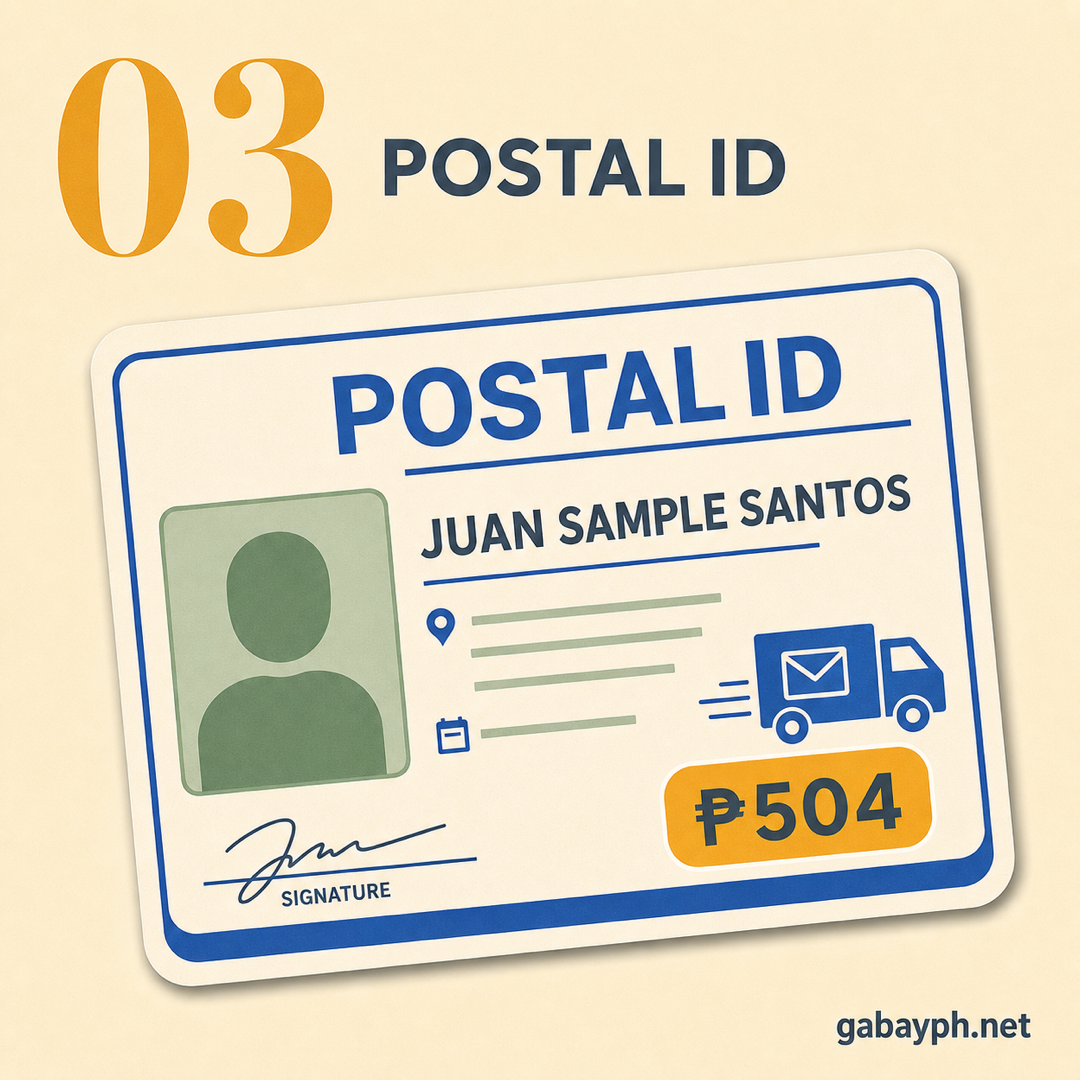
Step 2: Apply for a Postal ID (Week 1)
Hakbang 2: Mag-apply ng Postal ID (Linggo 1)
The Postal ID is one of the most accessible government IDs in the Philippines. PHLPost (Philippine Postal Corporation) has relaxed requirements — they accept a PSA birth certificate plus a barangay clearance as your identification. No existing government photo ID needed. This is why it is the ideal second step for someone building from zero.
Ang Postal ID ay isa sa pinaka-accessible na government ID sa Pilipinas. Ang PHLPost (Philippine Postal Corporation) ay may relaxed requirements — tinatanggap nila ang PSA birth certificate kasama ang barangay clearance bilang iyong identifikasyon. Hindi kailangan ng existing government photo ID. Kaya ito ang ideal na pangalawang hakbang para sa isang nagtatayo mula sa wala.
What you need:
Ang kailangan mo:
- Accomplished Postal ID application form (available at the post office)
- PSA Birth Certificate (original)
- Barangay Clearance (original, from Step 1)
- 1 piece 1x1 photo (white background) — some branches take your photo on-site
- Na-accomplish na Postal ID application form (available sa post office)
- PSA Birth Certificate (original)
- Barangay Clearance (original, mula sa Hakbang 1)
- 1 piraso 1x1 na litrato (puting background) — ang ilang branch ay kumukuha ng litrato on-site
Cost: ₱550 regular or ₱650 rush
Time: 15–30 minutes to apply, 2–4 weeks for delivery (regular) or 3 working days (rush)
Validity: 3 yearsGastos: ₱550 regular o ₱650 rush
Oras: 15–30 minuto para mag-apply, 2–4 na linggo para sa delivery (regular) o 3 working days (rush)
Bisa: 3 taonVisit your nearest post office. The Postal ID is widely accepted as a valid government-issued photo ID for employment, bank accounts, NBI clearance, and many other transactions. This will be your first photo ID — isang malaking upgrade.
Bumisita sa iyong pinakamalapit na post office. Ang Postal ID ay malawakang tinatanggap bilang valid na government-issued photo ID para sa employment, bank accounts, NBI clearance, at maraming iba pang transaksyon. Ito ang magiging unang photo ID mo — isang malaking upgrade.
-
Step 3: Register for the National ID / PhilSys (Week 1–2)
Hakbang 3: Mag-register para sa National ID / PhilSys (Linggo 1–2)
The Philippine Identification System (PhilSys) National ID is the government's flagship identification card. The best part? It only requires a PSA birth certificate to register. You do not need any other government ID. This makes it perfect for someone starting from zero.
Ang Philippine Identification System (PhilSys) National ID ang flagship identification card ng gobyerno. Ang pinakamagandang bahagi? Kailangan lang ng PSA birth certificate para makapag-register. Hindi mo kailangan ng ibang government ID. Perpekto ito para sa isang nagsisimula mula sa wala.
What you need:
Ang kailangan mo:
- PSA Birth Certificate (original)
- Any supporting document with address (barangay clearance, utility bill, or cedula)
- PSA Birth Certificate (original)
- Kahit anong supporting document na may address (barangay clearance, utility bill, o cedula)
Cost: FREE (first issuance)
Time: 30 min–1 hour for registration, 2–6 months for card delivery
Validity: Lifetime (no expiration)Gastos: LIBRE (unang issuance)
Oras: 30 min–1 oras para sa registration, 2–6 na buwan para sa delivery ng card
Bisa: Panghabambuhay (walang expiration)Register at a PhilSys registration center — these are located in malls, city halls, and government offices. After registration, you will receive an ePhilID transaction slip immediately. This slip can already be used as proof of registration while you wait for your physical card. The physical card takes 2–6 months to arrive, pero the ePhilID printout is accepted by many agencies in the meantime.
Mag-register sa PhilSys registration center — matatagpuan ang mga ito sa mga mall, city hall, at government office. Pagkatapos ng registration, makakatanggap ka kaagad ng ePhilID transaction slip. Ang slip na ito ay pwede nang gamitin bilang proof of registration habang naghihintay ka ng iyong physical card. Ang physical card ay tumatagal ng 2–6 buwan bago dumating, pero ang ePhilID printout ay tinatanggap ng maraming ahensya sa pansamantala.
Read our full guide: How to Register for a National ID (PhilSys)
Basahin ang aming buong gabay: Paano Mag-register para sa National ID (PhilSys)
-
Step 4: Get NBI Clearance (Week 2–3)
Hakbang 4: Kumuha ng NBI Clearance (Linggo 2–3)
Now that you have at least 2 valid IDs (Postal ID + barangay clearance, or ePhilID + barangay clearance), you can apply for an NBI clearance. The NBI requires at least one valid government-issued photo ID, and your Postal ID or ePhilID printout qualifies.
Ngayong mayroon ka nang hindi bababa sa 2 valid na ID (Postal ID + barangay clearance, o ePhilID + barangay clearance), maaari ka nang mag-apply ng NBI clearance. Nangangailangan ang NBI ng hindi bababa sa isang valid na government-issued photo ID, at ang iyong Postal ID o ePhilID printout ay kwalipikado.
What you need:
Ang kailangan mo:
- At least 1 valid government photo ID (Postal ID or ePhilID)
- Online registration at clearance.nbi.gov.ph
- ₱130 payment (via GCash, Maya, or bank)
- Hindi bababa sa 1 valid na government photo ID (Postal ID o ePhilID)
- Online registration sa clearance.nbi.gov.ph
- ₱130 na bayad (sa pamamagitan ng GCash, Maya, o bangko)
Cost: ₱130
Time: 30 min–2 hours on appointment day (same-day release if no hit)
Validity: 1 yearGastos: ₱130
Oras: 30 min–2 oras sa araw ng appointment (same-day release kung walang hit)
Bisa: 1 taonThe NBI clearance is one of the most universally required documents for employment in the Philippines. Getting it now means you are almost job-ready. Book your appointment online, pay the ₱130 fee, then visit the branch on your scheduled date for biometrics.
Ang NBI clearance ay isa sa pinaka-universally required na dokumento para sa employment sa Pilipinas. Ang pagkuha nito ngayon ay nangangahulugang halos handa ka na sa trabaho. Mag-book ng appointment online, bayaran ang ₱130 na fee, pagkatapos ay pumunta sa branch sa iyong naka-schedule na petsa para sa biometrics.
Read our full guide: How to Get NBI Clearance Online
Basahin ang aming buong gabay: Paano Kumuha ng NBI Clearance Online
-
Step 5: Get Your TIN from the BIR (Week 3–4)
Hakbang 5: Kumuha ng TIN sa BIR (Linggo 3–4)
A Tax Identification Number (TIN) is required for any form of employment in the Philippines — whether you are an employee, freelancer, or business owner. The Bureau of Internal Revenue (BIR) issues your TIN, and you only get one for your entire life.
Ang Tax Identification Number (TIN) ay kinakailangan para sa anumang uri ng trabaho sa Pilipinas — empleyado man, freelancer, o may-ari ng negosyo. Ang Bureau of Internal Revenue (BIR) ang nag-i-issue ng iyong TIN, at isa lang ang makukuha mo sa buong buhay mo.
What you need:
Ang kailangan mo:
- BIR Form 1902 (for employees) or BIR Form 1901 (for self-employed/freelance)
- Any valid government-issued ID (Postal ID, ePhilID, or NBI Clearance)
- PSA Birth Certificate
- BIR Form 1902 (para sa mga empleyado) o BIR Form 1901 (para sa self-employed/freelance)
- Kahit anong valid na government-issued ID (Postal ID, ePhilID, o NBI Clearance)
- PSA Birth Certificate
Cost: FREE
Time: 1–3 hours (walk-in at the RDO), same-day issuance
Validity: LifetimeGastos: LIBRE
Oras: 1–3 oras (walk-in sa RDO), same-day issuance
Bisa: PanghabambuhayVisit the BIR Revenue District Office (RDO) that has jurisdiction over your place of residence or employment. If your employer is already processing your TIN for you, even better — just provide them with the documents they need. Remember: never apply for a second TIN. Having multiple TINs is a violation of the law.
Bumisita sa BIR Revenue District Office (RDO) na may nasasakupan sa iyong tirahan o pinagtratrabahuhan. Kung ang employer mo na ang nagpoproseso ng TIN mo, mas mabuti — ibigay lang sa kanila ang mga dokumentong kailangan nila. Tandaan: huwag kailanman mag-apply ng pangalawang TIN. Ang pagkakaroon ng maramihang TIN ay paglabag sa batas.
-
Step 6: Register for SSS, PhilHealth, and Pag-IBIG (Week 4–5)
Hakbang 6: Mag-register sa SSS, PhilHealth, at Pag-IBIG (Linggo 4–5)
These three are mandatory for all employed Filipinos and all offer free online registration. Register at sss.gov.ph (SSS guide), philhealth.gov.ph (PhilHealth guide), and pagibigfundservices.com (Pag-IBIG guide). Each requires a PSA birth certificate + 1 valid ID. You can finish all three registrations in about 1–2 hours online. Print or screenshot your temporary numbers for reference.
Ang tatlong ito ay mandatory para sa lahat ng employed na Pilipino at lahat ay nag-o-offer ng libreng online registration. Mag-register sa sss.gov.ph (SSS gabay), philhealth.gov.ph (PhilHealth gabay), at pagibigfundservices.com (Pag-IBIG gabay). Bawat isa ay nangangailangan ng PSA birth certificate + 1 valid ID. Matatapos mo ang tatlong registration sa loob ng 1–2 oras online. I-print o i-screenshot ang iyong mga temporary number bilang reference.
-
Step 7: You're Now Ready for Passport & Driver's License (Week 6–8)
Hakbang 7: Handa Ka Na para sa Passport at Driver's License (Linggo 6–8)
Congratulations — you now have a full government ID portfolio and more than enough documents to apply for the two most powerful IDs in the Philippines.
Congratulations — mayroon ka nang kumpletong government ID portfolio at higit sa sapat na dokumento para mag-apply ng dalawang pinakamakapangyarihang ID sa Pilipinas.
Philippine Passport (₱950–1,200) — book at passport.gov.ph. See our Passport guide for full details.
Driver's License (₱535–1,120) — apply at any LTO branch. See our Driver's License guide for the full process.Philippine Passport (₱950–1,200) — mag-book sa passport.gov.ph. Tingnan ang aming Passport gabay para sa buong detalye.
Driver's License (₱535–1,120) — mag-apply sa kahit anong LTO branch. Tingnan ang aming Driver's License gabay para sa buong proseso.
Total Cost Breakdown
Kabuuang Breakdown ng Gastos
Here is what you can expect to spend for the entire 7-step ID building process:
Narito ang maaari mong asahang gastos para sa buong 7-hakbang na ID building process:
| Document | Dokumento | Cost | Gastos |
|---|---|---|---|
| PSA Birth Certificate | ₱155–205 | ||
| Cedula + Barangay Clearance | Cedula + Barangay Clearance | ₱100–350 | |
| Postal ID | ₱550–650 | ||
| National ID (PhilSys) | FREE | LIBRE | |
| NBI Clearance | ₱155 | ||
| TIN | FREE | LIBRE | |
| SSS / PhilHealth / Pag-IBIG | FREE (registration only) | LIBRE (registration lang) | |
| TOTAL | ~₱700–1,200 |
Optional additions: Passport (₱950–1,200) and Driver's License (₱535–1,120 including TDC and exams). If you include these, the full portfolio costs approximately ₱2,200–3,500 total.
Mga opsyonal na dagdag: Passport (₱950–1,200) at Driver's License (₱535–1,120 kasama ang TDC at exams). Kung isasama mo ang mga ito, ang kabuuang portfolio ay nagkakahalaga ng humigit-kumulang ₱2,200–3,500 sa kabuuan.
Realistic Timeline
Makatotohanang Timeline
Here is a realistic week-by-week plan if you start today:
Narito ang makatotohanang plano bawat linggo kung magsisimula ka ngayon:
- Day 1: Order PSA birth certificate online (if you don't have one). Get cedula + barangay clearance at your barangay hall.
- Week 1: Apply for Postal ID at the post office. Register for National ID at a PhilSys center. PSA birth certificate arrives (if ordered online).
- Week 2–3: Book NBI clearance appointment online, visit branch. Apply for TIN at the BIR if you are starting employment.
- Week 3–4: Register for SSS, PhilHealth, and Pag-IBIG online (or walk-in). Postal ID arrives.
- Week 5–6: ePhilID printout received. You now have 3+ valid government photo IDs.
- Week 6–8: Apply for passport and/or driver's license if needed.
- Araw 1: Mag-order ng PSA birth certificate online (kung wala ka pa). Kumuha ng cedula + barangay clearance sa iyong barangay hall.
- Linggo 1: Mag-apply ng Postal ID sa post office. Mag-register para sa National ID sa PhilSys center. Dumating ang PSA birth certificate (kung in-order online).
- Linggo 2–3: Mag-book ng NBI clearance appointment online, bumisita sa branch. Mag-apply ng TIN sa BIR kung magsisimula ka ng trabaho.
- Linggo 3–4: Mag-register sa SSS, PhilHealth, at Pag-IBIG online (o walk-in). Dumating ang Postal ID.
- Linggo 5–6: Natanggap ang ePhilID printout. Mayroon ka nang 3+ valid na government photo ID.
- Linggo 6–8: Mag-apply ng passport at/o driver's license kung kailangan.
Key insight: You can work on multiple IDs in parallel. While waiting for your Postal ID to be delivered, register for PhilSys. While waiting for your NBI clearance appointment, register for SSS online. Hindi mo kailangang hintayin ang isa bago simulan ang isa. Maximize your time.
Mahalagang paalala: Pwede mong gawin ang maraming ID nang sabay-sabay. Habang naghihintay na ma-deliver ang Postal ID mo, mag-register sa PhilSys. Habang naghihintay ng NBI clearance appointment, mag-register sa SSS online. Hindi mo kailangang hintayin ang isa bago simulan ang isa. I-maximize ang iyong oras.
Pro Tips & What to Do If Something Goes Wrong
Mga Payo at Ano ang Gagawin Kapag May Problema
- If your birth certificate has errors (wrong spelling, wrong birthdate): You need to file a petition for correction at your Local Civil Registrar (LCR). For clerical errors (misspelled name, wrong sex, etc.), this is a simple administrative process under RA 9048 that takes 2–4 weeks and costs ₱1,000–3,000. For substantive errors (wrong parents, wrong birthdate), you may need a court order, which takes longer and costs more. Fix this FIRST before applying for any other ID — all your IDs will be based on your birth certificate information.
- Start with the barangay — they are the most understanding. Barangay halls deal with residents who have no IDs all the time. They are your best ally in the zero-ID situation. Huwag mahiya — pumunta ka lang at sabihin mong kailangan mo ng clearance at wala kang ibang ID, tutulungan ka nila.
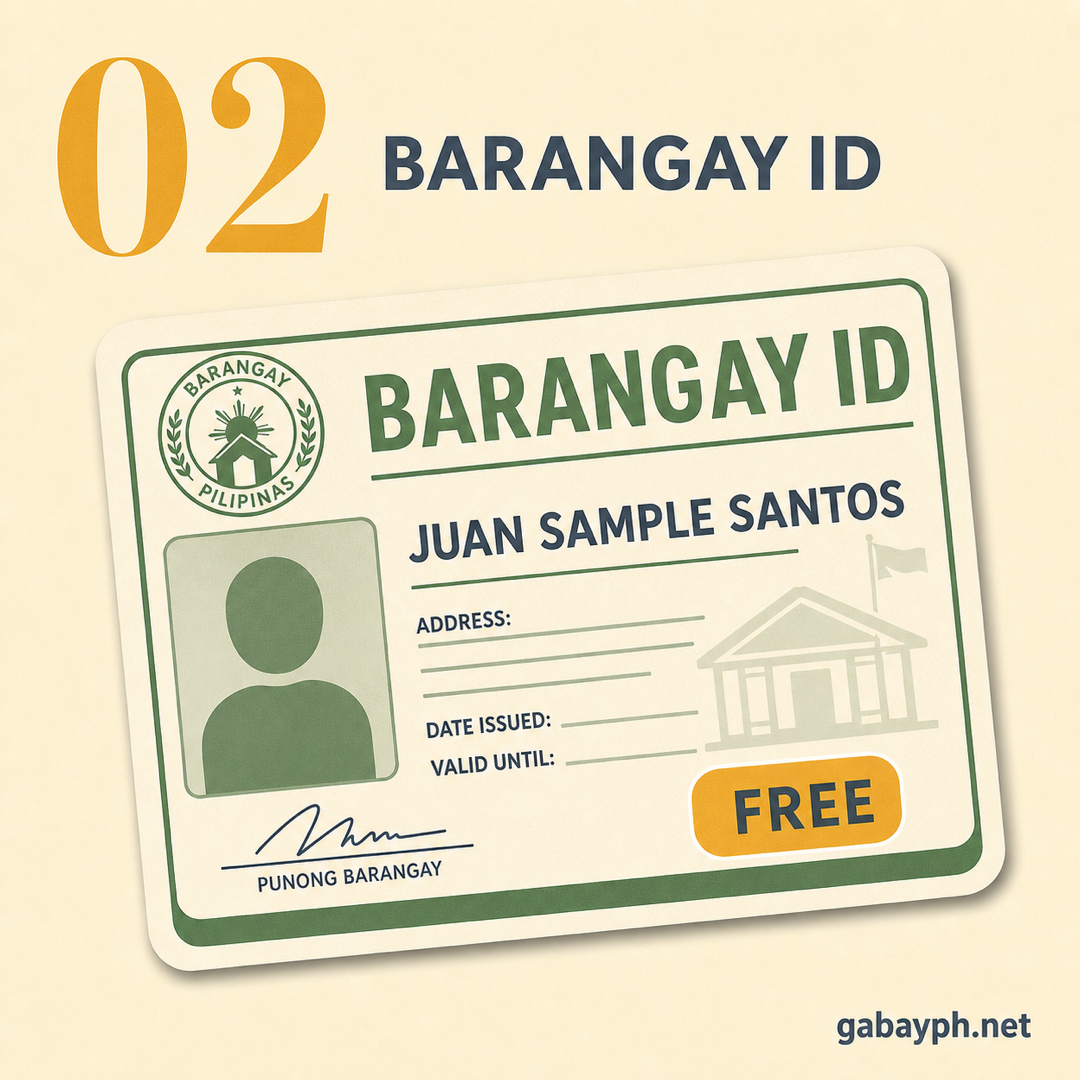
- If your barangay requires a "Barangay ID" before the clearance, get that first. Some barangays issue a separate barangay ID (not the same as the clearance) that only requires proof of residency. This is free or costs ₱50–100 and can serve as your first-ever photo ID at the local level.
- Ask about senior citizen or PWD assistance. If you are a senior citizen (60+) or a person with disability, many agencies have priority lanes, discounts, and exemptions. Huwag mag-atubiling magtanong — may karapatan ka sa mga ito.
- Kung may error ang birth certificate mo (maling spelling, maling birthdate): Kailangan mong mag-file ng petition for correction sa iyong Local Civil Registrar (LCR). Para sa clerical errors (maling spelling ng pangalan, maling sex, atbp.), ito ay simpleng administrative process sa ilalim ng RA 9048 na tumatagal ng 2–4 na linggo at nagkakahalaga ng ₱1,000–3,000. Para sa substantive errors (maling magulang, maling birthdate), maaaring kailanganin mo ng court order, na mas matagal at mas mahal. Ayusin ito MUNA bago mag-apply ng anumang iba pang ID — lahat ng iyong ID ay ibabatay sa impormasyon ng iyong birth certificate.
- Magsimula sa barangay — sila ang pinaka-maunawain. Ang barangay hall ay nakaka-handle ng mga residenteng walang ID sa lahat ng oras. Sila ang pinakamagandang kakampi mo sa zero-ID na sitwasyon. Huwag mahiya — pumunta ka lang at sabihin mong kailangan mo ng clearance at wala kang ibang ID, tutulungan ka nila.
- Kung ang barangay mo ay nangangailangan ng "Barangay ID" bago ang clearance, kunin muna iyon. Ang ilang barangay ay nag-i-issue ng hiwalay na barangay ID (hindi pareho sa clearance) na nangangailangan lang ng patunay ng paninirahan. Ito ay libre o nagkakahalaga ng ₱50–100 at maaaring maging unang photo ID mo sa local level.
- Magtanong tungkol sa senior citizen o PWD assistance. Kung ikaw ay senior citizen (60+) o isang person with disability, maraming ahensya ang may priority lanes, discounts, at exemptions. Huwag mag-atubiling magtanong — may karapatan ka sa mga ito.
Frequently Asked Questions
Mga Madalas Itanong
Can a barangay clearance be used as a valid ID?
Pwede bang gamitin ang barangay clearance bilang valid ID?
Not as a primary ID, but it is widely accepted as a supporting document when combined with a birth certificate. It is your bridge to the Postal ID, which IS a widely accepted primary government ID.
Hindi bilang primary ID, pero malawakang tinatanggap bilang supporting document kapag pinagsama sa birth certificate. Ito ang tulay mo patungo sa Postal ID, na ISANG malawakang tinatanggap na primary government ID.
Can I get a National ID without any other ID?
Pwede ba akong kumuha ng National ID nang walang ibang ID?
I'm 18 and just starting out — which ID should I get first?
18 na ako at kakasimulan lang — aling ID ang dapat kong unang kunin?
Follow the exact order in this guide: barangay clearance → Postal ID → National ID. These give you your first photo IDs. If starting a job soon, prioritize TIN and SSS/PhilHealth/Pag-IBIG next.
Sundin ang pagkakasunod-sunod sa gabay na ito: barangay clearance → Postal ID → National ID. Ito ang magbibigay ng unang photo ID mo. Kung magsisimula ka na ng trabaho, unahin ang TIN at SSS/PhilHealth/Pag-IBIG.
Can I apply for a job with just a Postal ID and NBI clearance?
Pwede ba akong mag-apply ng trabaho gamit lang ang Postal ID at NBI clearance?
Yes, for most entry-level jobs. A Postal ID and NBI clearance — combined with your SSS number, TIN, PhilHealth, and Pag-IBIG numbers — are enough to satisfy the pre-employment requirements of most Philippine employers. Some companies may also ask for a barangay clearance, police clearance, or cedula, all of which you will already have if you followed this guide. Ang pinakamahalaga sa employer ay may valid government ID ka, may NBI clearance, at may SSS/TIN/PhilHealth/Pag-IBIG numbers para sa payroll.
Oo, para sa karamihan ng entry-level na trabaho. Ang Postal ID at NBI clearance — kasama ang iyong SSS number, TIN, PhilHealth, at Pag-IBIG numbers — ay sapat na para matugunan ang pre-employment requirements ng karamihan ng Philippine employers. Ang ilang kumpanya ay maaari ring humingi ng barangay clearance, police clearance, o cedula, na lahat ay mayroon ka na kung sinunod mo ang gabay na ito. Ang pinakamahalaga sa employer ay may valid government ID ka, may NBI clearance, at may SSS/TIN/PhilHealth/Pag-IBIG numbers para sa payroll.