How to Apply for a Postal ID in the Philippines (2026 Updated Guide)
Paano Mag-apply ng Postal ID sa Pilipinas (2026 Updated Guide)
The 5-Step Walkthrough
Postal ID in five steps.
Quick Summary
Mabilis na Buod
Table of Contents
Talaan ng Nilalaman

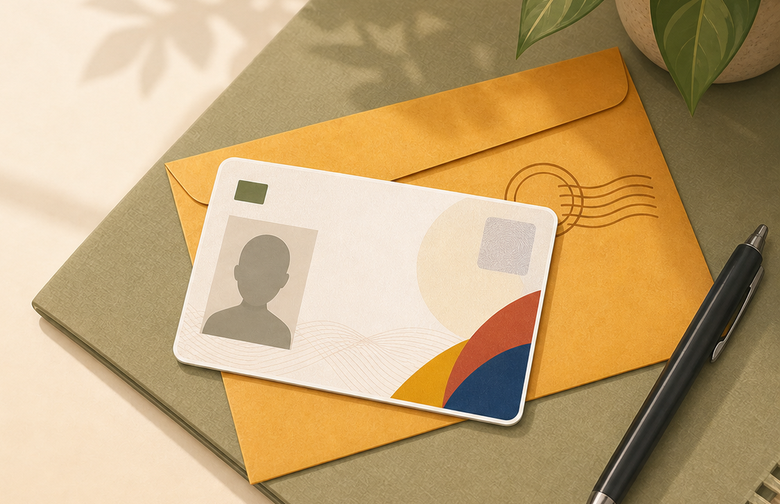
What Is a Postal ID?
Ano ang Postal ID?
A Postal ID is a government-issued ID from the Philippine Postal Corporation (PHLPost). At ₱550, it is one of the most affordable valid IDs in the Philippines and a popular first ID for those who do not yet have a passport or driver's license. It is recognized by BSP, banks, and government agencies nationwide, and it is delivered straight to your home.
Ang Postal ID ay isang government-issued ID mula sa Philippine Postal Corporation (PHLPost). Sa ₱550, isa ito sa pinakamurang valid ID sa Pilipinas at popular na unang ID para sa mga wala pang passport o driver's license. Kinikilala ito ng BSP, mga bangko, at mga government agencies sa buong bansa, at idine-deliver ito diretso sa iyong bahay.
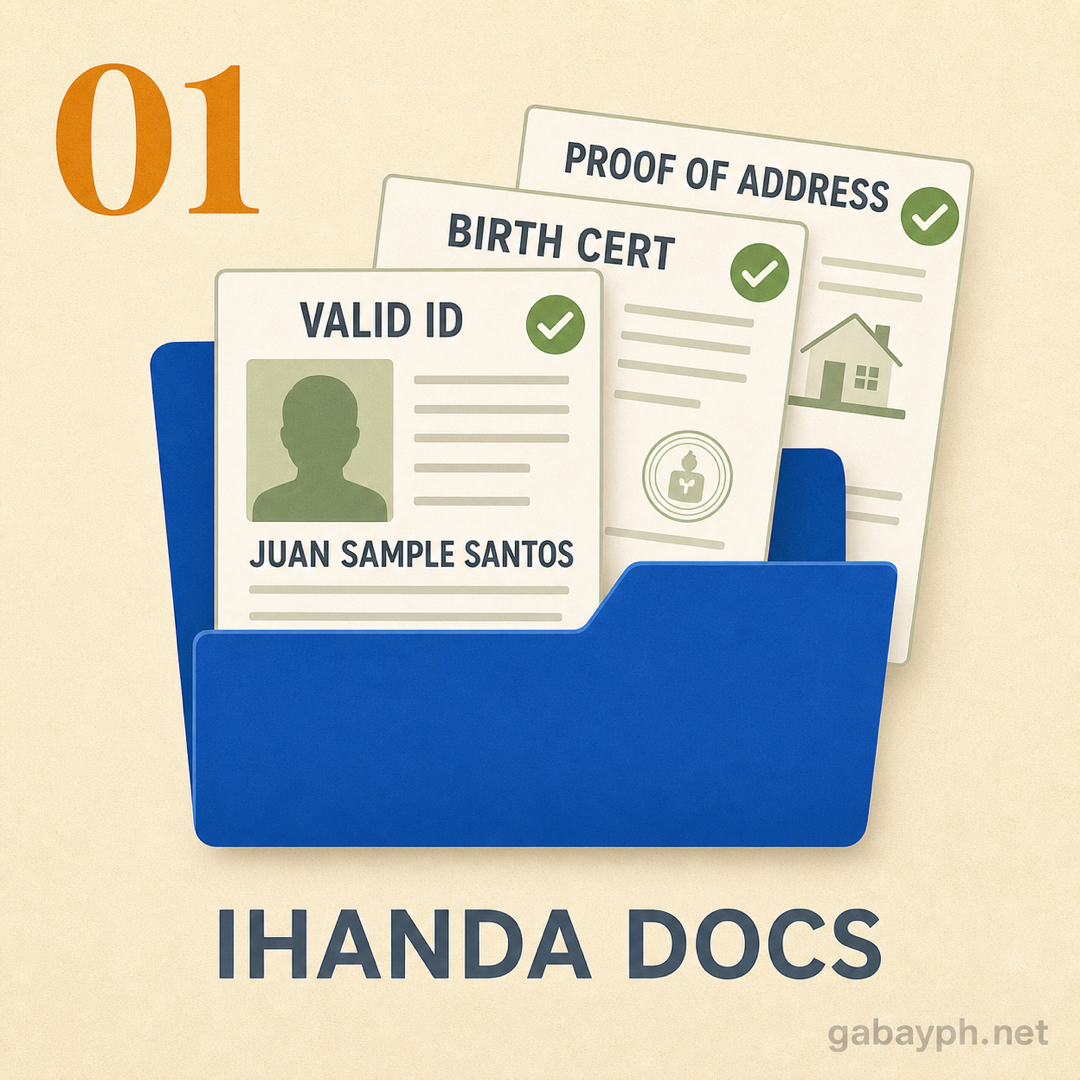
Requirements Checklist
Checklist ng mga Kailangan
- PSA-issued Birth Certificate — Original copy with security features (security paper with visible watermark). You can order one online at PSAHelpline.ph if you don't have it yet.
- Barangay Clearance or Certificate of Residency — Get this from your barangay hall. This confirms your current address and is usually issued within 15–30 minutes. Fee is around ₱50–₱150 depending on your barangay.
- At least one (1) valid supporting ID — If you have any existing government ID (school ID, company ID, PhilSys National ID, voter's ID), bring it. If you have NO ID at all, the PSA birth certificate + barangay clearance combination is accepted as supporting documents.
- Completed application form — Available at the post office or downloadable from the PHLPost website. You can also fill it out on-site.
- 1x1 or 2x2 ID photo — Some branches require you to bring photos, while others have an in-house photo capture system. Call ahead or check online to be sure.
- PSA-issued Birth Certificate — Original copy na may security features (security paper na may visible watermark). Pwede kang umorder online sa PSAHelpline.ph kung wala ka pa nito.
- Barangay Clearance o Certificate of Residency — Kunin ito sa inyong barangay hall. Ito ay nagpapatunay ng iyong kasalukuyang address at karaniwang inilalabas sa loob ng 15–30 minuto. Ang bayad ay mga ₱50–₱150 depende sa inyong barangay.
- Hindi bababa sa isang (1) valid na supporting ID — Kung mayroon kang anumang existing government ID (school ID, company ID, PhilSys National ID, voter's ID), dalhin ito. Kung WALA kang ID, tinatanggap ang kombinasyon ng PSA birth certificate + barangay clearance bilang supporting documents.
- Nakumpletong application form — Available sa post office o mare-download mula sa PHLPost website. Pwede mo rin itong sagutan sa mismong opisina.
- 1x1 o 2x2 ID photo — May mga branch na nangangailangan na magdala ka ng mga larawan, habang ang iba ay may in-house photo capture system. Tumawag muna o mag-check online para sigurado.
Step-by-Step: How to Apply for a Postal ID
Hakbang-Hakbang: Paano Mag-apply ng Postal ID
-
Prepare Your Requirements
Ihanda ang mga Kailangan Mo
Before anything else, gather all the documents listed in the requirements checklist above. The most important document is your PSA birth certificate — this is non-negotiable and every post office will require it. If you do not have one yet, you can order it online at PSAHelpline.ph for around ₱365 with delivery, or visit your local PSA outlet or Robinsons or SM Business Center for same-day release.
Bago ang lahat, tipunin ang lahat ng dokumentong nakalista sa requirements checklist sa itaas. Ang pinakamahalagang dokumento ay ang iyong PSA birth certificate — ito ay hindi mapag-uusapan at bawat post office ay hihilingin ito. Kung wala ka pa nito, pwede kang umorder online sa PSAHelpline.ph sa halagang mga ₱365 kasama ang delivery, o pumunta sa iyong lokal na PSA outlet o Robinsons o SM Business Center para sa same-day release.
Next, get your barangay clearance. Visit your barangay hall and bring a valid ID or any proof of residency (utility bill in your name, lease contract, etc.). The barangay clearance usually costs ₱50–₱150 and takes about 15–30 minutes to process. Tip: some barangays issue this on a walk-in basis, pero mas mabilis kung may appointment ka or pumunta ka ng maagang umaga.
Susunod, kumuha ng iyong barangay clearance. Pumunta sa iyong barangay hall at magdala ng valid ID o anumang patunay ng tirahan (utility bill sa pangalan mo, lease contract, atbp.). Ang barangay clearance ay karaniwang nagkakahalaga ng ₱50–₱150 at tumatagal ng mga 15–30 minuto. Payo: may mga barangay na nag-iissue nito sa walk-in basis, pero mas mabilis kung may appointment ka o pumunta ka ng maagang umaga.
Also prepare your ID photos. While some post offices have their own photo capture station, many still require applicants to bring 1x1 or 2x2 photos with a white background. To be safe, bring at least four copies — three for the application and one extra for your records.
Maghanda din ng ID photos. Bagama't may mga post office na may sariling photo capture station, marami pa rin ang nangangailangan na magdala ang mga applicant ng 1x1 o 2x2 photos na may puting background. Para sigurado, magdala ng hindi bababa sa apat na kopya — tatlo para sa application at isang extra para sa iyong records.
-
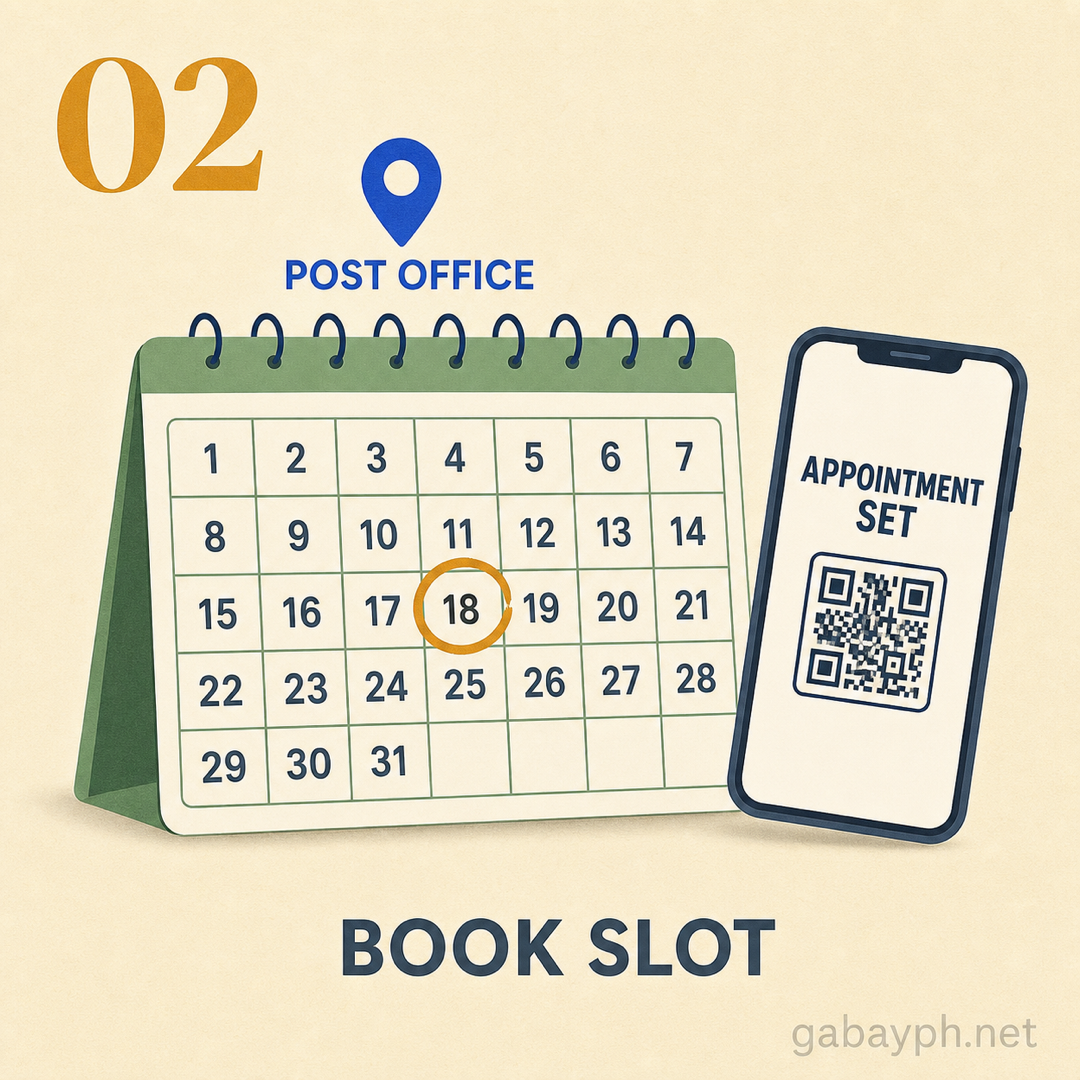
Book an Appointment Online (Recommended)
Mag-book ng Appointment Online (Inirerekomenda)
PHLPost now offers online appointment booking through their official website at phlpost.gov.ph. While walk-ins are still accepted at many branches, booking an appointment online saves you from long queues and ensures you get served on your preferred date.
Nag-aalok na ngayon ang PHLPost ng online appointment booking sa kanilang opisyal na website sa phlpost.gov.ph. Bagama't tinatanggap pa rin ang walk-ins sa maraming branch, ang pag-book ng appointment online ay nakakapagligtas sa iyo mula sa mahabang pila at sinisigurong maseserbisyuhan ka sa gusto mong petsa.
To book online:
Para mag-book online:
- Go to phlpost.gov.ph and navigate to the Postal ID section
- Select "Apply for Postal ID" or "Book Appointment"
- Choose your preferred post office branch (pick the one nearest to your address for convenience)
- Select your preferred date and time slot
- Fill in your basic information (name, contact number, email)
- Receive your appointment confirmation via email or SMS
- Pumunta sa phlpost.gov.ph at pumunta sa Postal ID section
- Piliin ang "Apply for Postal ID" o "Book Appointment"
- Piliin ang gusto mong post office branch (piliin ang pinakamalapit sa iyong address para mas maginhawa)
- Piliin ang gusto mong petsa at time slot
- Ibigay ang iyong basic information (pangalan, contact number, email)
- Makakatanggap ka ng appointment confirmation sa email o SMS
Not all branches have online booking yet. If your preferred branch is not listed, you can simply walk in during operating hours (usually 8:00 AM to 5:00 PM, Monday to Friday). Pumunta ka nang maaga — mga 7:30 AM — para mauna ka sa pila.
Hindi lahat ng branch ay may online booking pa. Kung hindi nakalista ang gusto mong branch, pwede ka namang mag-walk in sa oras ng operasyon (karaniwang 8:00 AM hanggang 5:00 PM, Lunes hanggang Biyernes). Pumunta ka nang maaga — mga 7:30 AM — para mauna ka sa pila.
-
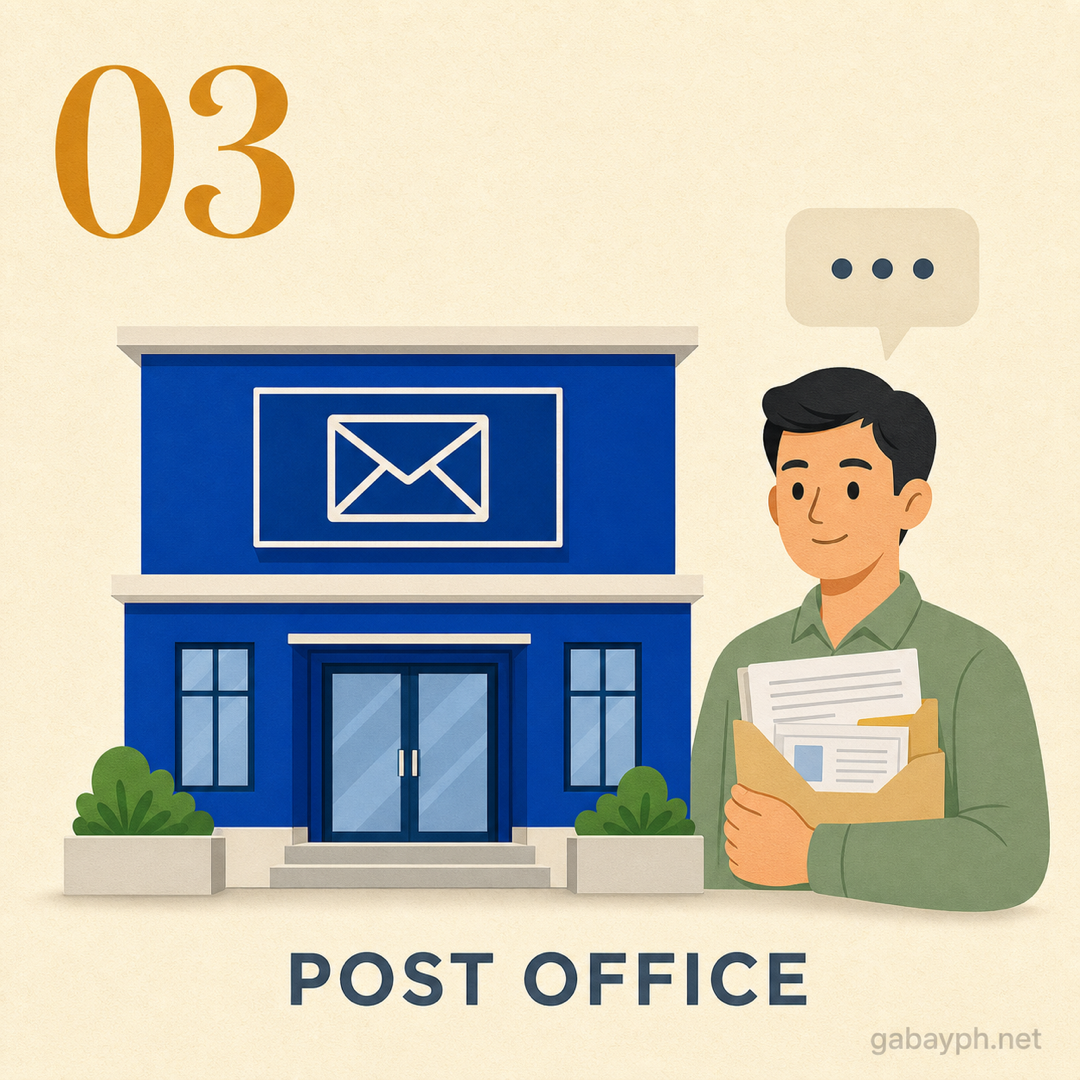
Visit the Post Office and Submit Your Application
Pumunta sa Post Office at I-submit ang Iyong Application
On your appointment day (or walk-in day), go to your chosen post office branch. Here is what to expect upon arrival:
Sa araw ng iyong appointment (o walk-in), pumunta sa napili mong post office branch. Ito ang dapat mong asahan pagdating:
- Get an application form — Pick up the Postal ID application form from the front desk. Fill it out completely with your personal information: full name, address, date of birth, contact number, and civil status.
- Queue at the Postal ID window — Present your completed form along with your supporting documents (PSA birth certificate, barangay clearance, supporting ID).
- Photo and biometrics capture — The staff will take your photograph and capture your digital signature. Some branches may also take fingerprints for the newer card format.
- Review your details — Before finalizing, the staff will show you a preview or summary of your information. Check everything carefully — your name, birthdate, and address should all be correct. Mahirap baguhin pag na-print na ang card.
- Kumuha ng application form — Kunin ang Postal ID application form sa front desk. Sagutan itong buo kasama ang iyong personal na impormasyon: buong pangalan, address, petsa ng kapanganakan, contact number, at civil status.
- Pumila sa Postal ID window — Ipakita ang iyong nakumpletong form kasama ang mga supporting documents (PSA birth certificate, barangay clearance, supporting ID).
- Photo at biometrics capture — Kukunan ka ng larawan ng staff at kukuhanin ang iyong digital signature. Ang ilang mga branch ay maaari ding kumuha ng fingerprints para sa mas bagong card format.
- I-review ang iyong mga detalye — Bago i-finalize, ipapakita sa iyo ng staff ang preview o summary ng iyong impormasyon. Suriin ang lahat nang mabuti — ang iyong pangalan, petsa ng kapanganakan, at address ay dapat lahat tama. Mahirap baguhin pag na-print na ang card.
The entire process at the post office usually takes 30 minutes to 1 hour, depending on the number of applicants. Sa mga branch na hindi gaanong matao, pwede kang matapos in under 30 minutes.
Ang buong proseso sa post office ay karaniwang tumatagal ng 30 minuto hanggang 1 oras, depende sa bilang ng mga applicant. Sa mga branch na hindi gaanong matao, pwede kang matapos nang wala pang 30 minuto.
-
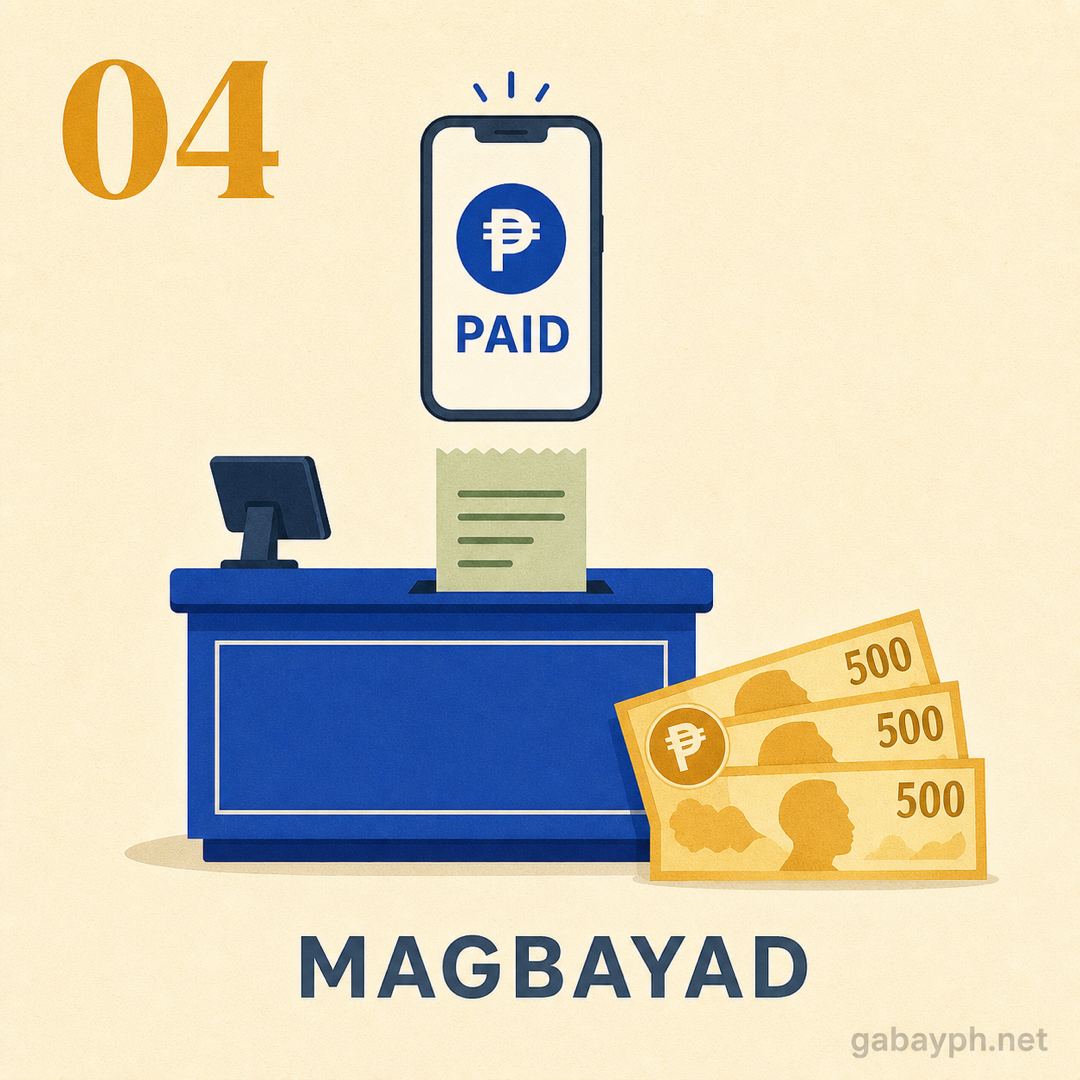
Pay the Processing Fee
Bayaran ang Processing Fee
After your application is processed, proceed to the cashier to pay the applicable fee. As of 2026, the fees are:
Pagkatapos ma-process ang iyong application, pumunta sa cashier para bayaran ang naaangkop na bayad. Simula 2026, ang mga bayarin ay:
- Regular processing:Regular processing: ₱550 (delivery in 2–4 weeks)(delivery sa loob ng 2–4 linggo)
- Rush processing:Rush processing: ₱650 (delivery in 7–15 business days)(delivery sa loob ng 7–15 business days)
Payment is made directly at the post office cashier. Most branches accept cash only, so bring exact change or bills. A few larger branches in Metro Manila may accept digital payments, but do not count on it. After paying, you will receive an official receipt and a claim stub with your tracking number — keep these safe because you will need the tracking number to check your delivery status.
Ang pagbabayad ay ginagawa diretso sa post office cashier. Karamihan ng mga branch ay tumatanggap ng cash lamang, kaya magdala ng tamang barya o pera. Iilang malalaking branch sa Metro Manila ang maaaring tumanggap ng digital payments, pero huwag umasa dito. Pagkatapos magbayad, makakatanggap ka ng opisyal na resibo at claim stub na may tracking number — itago itong mabuti dahil kakailanganin mo ang tracking number para i-check ang status ng iyong delivery.
-
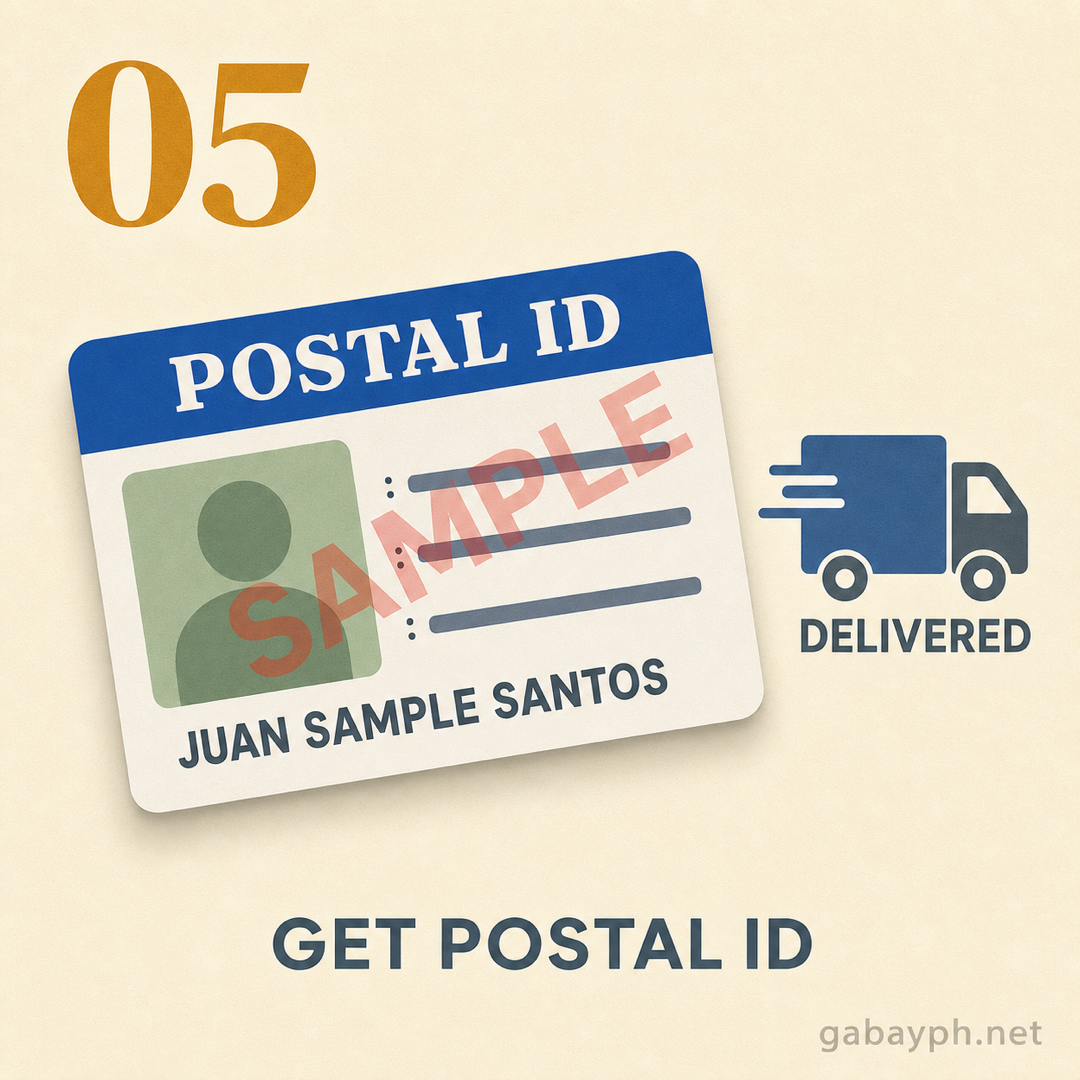
Wait for Delivery of Your Postal ID
Hintayin ang Pagdating ng Iyong Postal ID
Unlike most government IDs where you have to go back and pick up the card yourself, the Postal ID is delivered directly to your registered home address via registered mail. This is one of the most convenient things about it — no need for a second trip to the post office.
Hindi katulad ng karamihan ng government IDs kung saan kailangan mong bumalik at kunin ang card mismo, ang Postal ID ay idine-deliver diretso sa iyong registered home address sa pamamagitan ng registered mail. Isa ito sa pinakamaginhawang bagay tungkol dito — hindi na kailangan ng pangalawang biyahe sa post office.
Expected delivery timelines:
Inaasahang delivery timelines:
- Regular processing: 2 to 4 weeks from the date of application
- Rush processing: 7 to 15 business days from the date of application
- Provincial addresses: May take slightly longer (up to 6 weeks) due to mail routing
- Regular processing: 2 hanggang 4 na linggo mula sa petsa ng pag-apply
- Rush processing: 7 hanggang 15 business days mula sa petsa ng pag-apply
- Mga address sa probinsya: Posibleng mas matagal (hanggang 6 na linggo) dahil sa mail routing
You can track your Postal ID delivery status using the tracking number on your claim stub. Go to the PHLPost Track & Trace page at phlpost.gov.ph and enter your tracking number. If your ID has not arrived after the expected timeline, visit your local post office with your claim stub and receipt to file an inquiry.
Pwede mong i-track ang delivery status ng iyong Postal ID gamit ang tracking number sa iyong claim stub. Pumunta sa PHLPost Track & Trace page sa phlpost.gov.ph at ilagay ang iyong tracking number. Kung hindi pa dumating ang iyong ID pagkatapos ng inaasahang timeline, bumisita sa iyong lokal na post office kasama ang iyong claim stub at resibo para mag-file ng inquiry.
Important: make sure someone is home to receive the delivery. The mail carrier will require a signature upon receipt. If no one is home, they will leave a notice and you may need to pick it up at your local post office instead. Kaya sabihin mo sa kapamilya mo na baka dumating ang ID card mo anytime within the delivery window.
Mahalaga: siguraduhing may tao sa bahay para tanggapin ang delivery. Ang mail carrier ay mangangailangan ng pirma sa pagtanggap. Kung walang tao sa bahay, mag-iiwan sila ng notice at maaaring kailangan mong kunin na lang ito sa iyong lokal na post office. Kaya sabihin mo sa kapamilya mo na baka dumating ang ID card mo anytime sa loob ng delivery window.
Postal ID Fees Breakdown (2026)
Detalye ng Bayarin sa Postal ID (2026)
Here is a complete breakdown of the Postal ID costs so you can budget accordingly:
Narito ang kumpletong detalye ng mga gastos sa Postal ID para makapag-budget ka nang maayos:
- Postal ID processing fee (regular): ₱550 — includes card printing, security features, and delivery within Metro Manila and nearby provinces.
- Postal ID processing fee (rush): ₱650 — same inclusions but with priority processing and faster delivery (7–15 business days instead of 2–4 weeks).
- Barangay clearance: ₱50–₱150 (varies by barangay) — not included in the Postal ID fee, you need to get this separately from your barangay hall.
- PSA birth certificate: ₱365 (if ordering online with delivery) or ₱155 (walk-in at PSA outlet) — only if you do not already have a copy.
- ID photos (if required): ₱30–₱80 at photo studios near the post office.
- Postal ID processing fee (regular): ₱550 — kasama ang card printing, security features, at delivery sa loob ng Metro Manila at mga karatig na probinsya.
- Postal ID processing fee (rush): ₱650 — parehong kasama pero may priority processing at mas mabilis na delivery (7–15 business days sa halip na 2–4 linggo).
- Barangay clearance: ₱50–₱150 (iba-iba depende sa barangay) — hindi kasama sa Postal ID fee, kailangan mong kunin ito nang hiwalay sa inyong barangay hall.
- PSA birth certificate: ₱365 (kung mag-order online na may delivery) o ₱155 (walk-in sa PSA outlet) — kung wala ka pa ng kopya.
- ID photos (kung kailangan): ₱30–₱80 sa mga photo studio malapit sa post office.
Total estimated cost for a first-time applicant who needs everything: approximately ₱650–₱850. If you already have your PSA birth certificate and barangay clearance, the total is just the ₱550 regular fee. Kung tight ang budget mo, ito talaga ang pinakamurang option para sa valid government ID.
Kabuuang tantyang gastos para sa first-time applicant na kailangan ng lahat: humigit-kumulang ₱650–₱850. Kung mayroon ka nang PSA birth certificate at barangay clearance, ang total ay ₱550 na regular fee lang. Kung tight ang budget mo, ito talaga ang pinakamurang option para sa valid government ID.
Pro Tips for a Smooth Application
Mga Payo para sa Maayos na Application
- Go early in the morning. Post offices tend to get crowded by mid-morning. Arriving at 8:00 AM (or even 7:30 AM) gives you the best chance of a quick turnaround. Ang aga-aga pa, konti pa ang tao.
- Avoid Monday and the first week of the month. These are peak periods for most government offices. Tuesday to Thursday mid-month is usually the quietest time.
- Bring extra photocopies of all your documents. Some branches require photocopies in addition to originals. Having extras on hand saves you from running to a nearby photocopy shop.
- Double-check your address. The Postal ID will be delivered to the address you provide. Make sure it is your current and correct address — include floor/unit number for condos and apartment buildings.
- Choose rush processing if you need it soon. The ₱100 difference between regular (₱550) and rush (₱650) processing is worth it if you need the ID within 2 weeks for another application or transaction.
- Keep your claim stub and receipt. You need the tracking number to monitor your delivery and as proof of application if anything goes wrong. Take a photo of it too para may digital backup ka.
- Pumunta nang maaga sa umaga. Ang mga post office ay nagsisimulang dumami ang tao pagdating ng mid-morning. Ang pagdating ng 8:00 AM (o kahit 7:30 AM) ang nagbibigay sa iyo ng pinakamagandang tsansa para mabilis na proseso. Ang aga-aga pa, konti pa ang tao.
- Iwasan ang Lunes at unang linggo ng buwan. Ito ang mga peak periods para sa karamihan ng government offices. Martes hanggang Huwebes sa gitna ng buwan ang karaniwang pinaka-tahimik.
- Magdala ng mga dagdag na photocopy ng lahat ng dokumento mo. Ang ilang mga branch ay nangangailangan ng photocopies bukod pa sa originals. Ang pagkakaroon ng extra ay nakaka-iwas sa paghahanap ng malapit na photocopy shop.
- I-double-check ang iyong address. Ang Postal ID ay idine-deliver sa address na ibinigay mo. Siguraduhing ito ang iyong kasalukuyan at tamang address — isama ang floor/unit number para sa mga condo at apartment buildings.
- Piliin ang rush processing kung kailangan mo ito agad. Ang ₱100 na pagkakaiba sa pagitan ng regular (₱550) at rush (₱650) processing ay sulit kung kailangan mo ang ID sa loob ng 2 linggo para sa ibang application o transaksyon.
- Itago ang iyong claim stub at resibo. Kailangan mo ang tracking number para i-monitor ang delivery mo at bilang patunay ng application kung may mangyaring mali. Mag-photo din nito para may digital backup ka.
Frequently Asked Questions
Mga Madalas Itanong
How long is the Postal ID valid?
Gaano katagal valid ang Postal ID?
The Postal ID is valid for three (3) years from the date of issuance. After it expires, you will need to apply for a renewal by visiting a post office and paying the renewal fee, which is the same as the application fee. The expiration date is printed on the front of the card, so it is easy to keep track. Tip: set a reminder on your phone a month before it expires para hindi ka na-co-caught off guard.
Ang Postal ID ay valid sa loob ng tatlong (3) taon mula sa petsa ng paglabas. Pagkatapos mag-expire, kailangan mong mag-apply para sa renewal sa pamamagitan ng pagpunta sa post office at pagbabayad ng renewal fee, na pareho sa application fee. Ang expiration date ay naka-print sa harap ng card, kaya madaling i-track. Payo: mag-set ng reminder sa phone mo isang buwan bago mag-expire para hindi ka ma-caught off guard.
Can I use the Postal ID as a primary valid ID?
Pwede ko bang gamitin ang Postal ID bilang primary valid ID?
Yes! The Postal ID is recognized as a primary valid ID by the Bangko Sentral ng Pilipinas (BSP), government agencies, banks, and most private institutions. You can use it to open a bank account, apply for other government IDs (like NBI clearance), process SIM registration, and complete various transactions that require a valid government-issued ID. It is one of the most widely accepted IDs in the Philippines — halos lahat ng establishments tumatanggap nito.
Oo! Ang Postal ID ay kinikilala bilang primary valid ID ng Bangko Sentral ng Pilipinas (BSP), mga government agencies, mga bangko, at karamihan ng mga private institutions. Pwede mo itong gamitin para mag-bukas ng bank account, mag-apply ng ibang government IDs (tulad ng NBI clearance), mag-process ng SIM registration, at kumpletuhin ang iba't ibang transaksyon na nangangailangan ng valid government-issued ID. Isa ito sa pinakamalawak na tinatanggap na ID sa Pilipinas — halos lahat ng establishments tumatanggap nito.
How do I track my Postal ID delivery?
Paano i-track ang delivery ng Postal ID ko?
You can track your Postal ID delivery through the PHLPost Track & Trace system on their website at phlpost.gov.ph. Simply enter the tracking number from your claim stub and the system will show you the current status and location of your mail. Statuses include "Dispatched," "In Transit," "Arrived at Destination Post Office," and "Delivered." If the tracking shows no movement for more than 2 weeks, visit your nearest post office with your claim stub and receipt to file a follow-up inquiry. Tip: i-check mo every 3–4 days lang para hindi ka ma-stress sa paghihintay.
Pwede mong i-track ang delivery ng iyong Postal ID sa pamamagitan ng PHLPost Track & Trace system sa kanilang website sa phlpost.gov.ph. Ilagay lang ang tracking number mula sa iyong claim stub at ipapakita ng system ang kasalukuyang status at lokasyon ng iyong mail. Kasama sa mga status ang "Dispatched," "In Transit," "Arrived at Destination Post Office," at "Delivered." Kung walang galaw ang tracking sa loob ng higit sa 2 linggo, bumisita sa iyong pinakamalapit na post office kasama ang iyong claim stub at resibo para mag-file ng follow-up inquiry. Payo: i-check mo lang every 3–4 araw para hindi ka ma-stress sa paghihintay.
What if I don't have any valid ID yet?
Paano kung wala pa akong valid ID?
The Postal ID is actually one of the best first IDs to get precisely because it has the most relaxed requirements. If you have absolutely no government-issued ID yet, you can still apply using a combination of: (1) your PSA birth certificate as your primary supporting document, and (2) a barangay clearance or certificate of residency as proof of address and identity. Some branches may also accept a school ID, company ID, or cedula (community tax certificate) as additional supporting documents. The key takeaway: hindi mo kailangan ng existing valid government ID para makakuha ng Postal ID — that is exactly what makes it the best starting point for building your ID portfolio.
Ang Postal ID ang isa sa pinakamagandang unang ID na kunin dahil ito ang may pinakamaluwag na requirements. Kung wala ka talagang government-issued ID, pwede ka pa ring mag-apply gamit ang kombinasyon ng: (1) ang iyong PSA birth certificate bilang pangunahing supporting document, at (2) ang barangay clearance o certificate of residency bilang patunay ng address at pagkakakilanlan. Ang ilang mga branch ay maaari ring tumanggap ng school ID, company ID, o cedula (community tax certificate) bilang karagdagang supporting documents. Ang pangunahing takeaway: hindi mo kailangan ng existing valid government ID para makakuha ng Postal ID — iyan mismo ang nagpapasikat nito bilang pinakamagandang simula para sa pagbuo ng iyong ID portfolio.